Friday, October 30, 2009

Pee-Pee Tee Pee


Anyone with a baby boy knows you're always at risk of getting peed on during a diaper change. Ever seen one of these?

These little 'tee pees' are great for covering them up before you get sprayed. Once your little guys old enough to start wiggling, they don't stay on too well... but I've noticed that the smaller the tee pee the easier they fall off. So, in this case... bigger's better.

I made these using the tutorial HERE. Except I skipped the pinning. It's super easy and quick, and makes a great baby gift if you already have your own!

Tuesday, October 27, 2009

Fleece Scarf


Want to make a cute, simple, and cheap scarf?

First buy some fleece. I made this for my one year old so I only bought 1/8th of a yard of each color. If you want your scarf to be wider, I'd get up to a 1/4 yard. I made it in stripes of 2 colors, but you can do as many as you'd like.

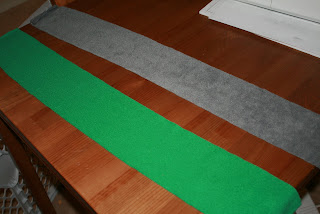
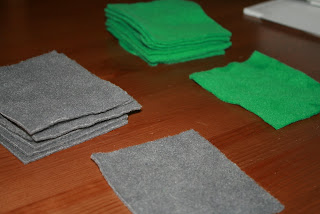
Cut your fleece into pieces about a 1/2 inch to an inch bigger than you want your stripe to be. If you want to make sure you use all the fabric, just keep folding your long piece of fleece over on itself until it's about the size of the stripe you want and cut along all the folds. (that's what I did so I didn't waste any fabric at the end).
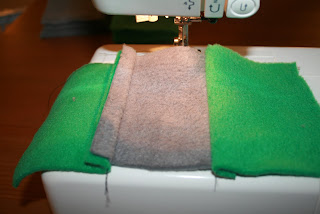
Next, sew one piece of each color together with 1/4 inch to 1/2 inch seam, (if you want your fringe longer, move your seam in further, just remember this will make your stripe smaller).

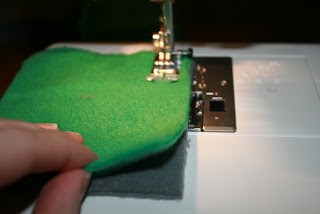
Now you'll want to alternate so that the excess fabric is on top at every other seam. A good way to do this if you're doing stripes, is to always make sure the same color you started with on top, is always on top when you make the seam.

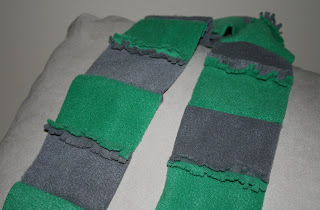
See how this will make the fringe alternate sides?
Continue sewing all your pieces together until you have the scarf the length you want.
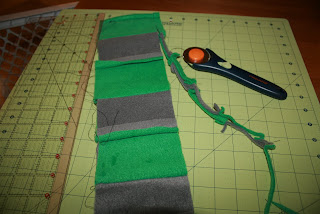
When you sew the pieces together they will probably not all line up in a perfect line, unless you're magical, so just trim off a tiny bit down the length on both sides and this will get you a nice straight line.

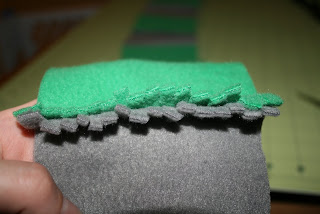
Now make the fringe by cutting small, parallel lines into the 1/4 inch sections of excess fleece. Don't cut all the way to the seam.
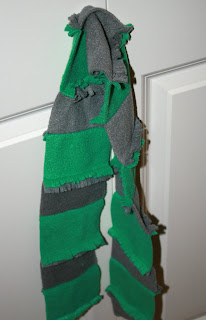
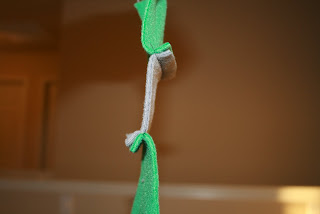
And you're done!
If you want to cut some fringe on the very ends of the scarf as well, you can. Fleece wont fray, so you're OK! :)
TA DA!

Baby Food Jar Candles


Have a bunch of glass baby food jars laying around and want to make a cute, decorative candle for the season? Here's a super easy way to use them up!


Materials:
-glass baby food jar
-tea light candle
-vellum
-ribbon
-paper / stamps / ink

First cut 2 strips of vellum at 4 1/2 inches by 2 1/2 inches.

Then cut 2 strips of paper or card stock at 1 inch by 4 1/2 inches

Glue or tape the paper strips onto the bottom of the vellum

Then stamp your vellum / paper to decorate for whatever season you'd like.

Then place the two pieces of vellum with the backs together (so the fronts are both on the outside) and punch two holes on each side.
Run ribbon through the holes and tie bows, knots, whatever you'd like.


Then place your baby food jar inside your finished vellum cover and put a tea light inside the bottom. When you light it up, it'll shine nicely through the vellum.

These are great for storing because all you have to do is pull out the jar and the candle sleeve will lay flat. So you can make some for every season and just rotate them in and out.


Monday, October 26, 2009

Halloween Decoration: Ghost

So, this is our first year in our house, and we don't have very much in the way of Halloween decorations. I figure I'll wait till everything's on clearance after this Halloween and we'll stock up for next year. In the meantime I decided to make some free, easy decorations.

This is one that kids would have fun doing.


First, get a white plastic garbage bag. Doesn't matter what size, just remember the smaller it is the smaller the ghost.

If it has a draw string top, cut that off.


Then cut down one of the long sides so it's open like the 'top' of the bag.


Now draw your ghost face up in the top corner where the two closed sides of the bag meet.

Now cut off the top corner above the eyes with a hole just about big enough for the spout of a milk jug.


Here comes the milk jug.... tie a string around the handle and tight under the lip of the spout....


Then back around the other side and tie a square knot.

Put your milk jug with the smooth part under the face of your ghost and the handle in back. Pull your string out and hang it up!


Halloween Costume: Basic Robe

Want to make a cheap, useful Halloween costume?

Think of all the costumes you can use a simple robe for: Wizard/Witch, Vampire, grim-reaper, skeleton, pretty much any male fantasy character..... use your imagination! This is a great addition to any Halloween costume box.

I made this robe using this tutorial. It's SOOOO easy!

I used black polyester because it hangs well and doesn't wrinkle when stored in a Halloween box :) I also cut a straight line off the edge for the neck to get a 'V'. The tutorial has you cut it in an arc, for a 'u' neck....to do this I would use a piece of chalk tied to a thick string. Measure the chalk to the end of the string as the 'Neck size' described in the tutorial, and just hold the end of the sting down on the corner and draw an arc on the fabric with your chalk. That'll make sure you get it symmetrical.

I made this for my one year old, who will be doing the Harry Potter thing this year, gotta do it now while it's still got 'hype'. So I made the hems very large so that in a few years if he wants to be something that we could again use a black robe for, all I have to do is take the hem out and hem it to his new height. I also figure if the 'chest' size becomes too tight, I can just cut a slit down the front of the robe, hem it up, and put a clasp on the front. If you want an open-style robe that's all you have to do to change it.

Happy Haunting!

PS- anyone else doing the Harry Potter thing, all you have to do is print off a 'house' crest on card stock, cut it out and pin it to the left breast of the robe. Click HERE for the link